How to create audio products for sale on Soundwise
 Updated
by Charis
Updated
by Charis
Soundwise allows you to easily create paid audio programs and sell them from both the web and the Soundwise mobile app. Here're the steps to create and charge for your audio programs.
Step 0: Connect your payout account
Before you set up your soundcasts and open your audio shop, please first set up your payout arrangement. So that you will get the sales proceeds automatically transferred to your bank account. To do so, please go to the "Publisher" tab on your dashboard. Under "Profile", scroll down to the block for "Set up Payouts with Stripe":
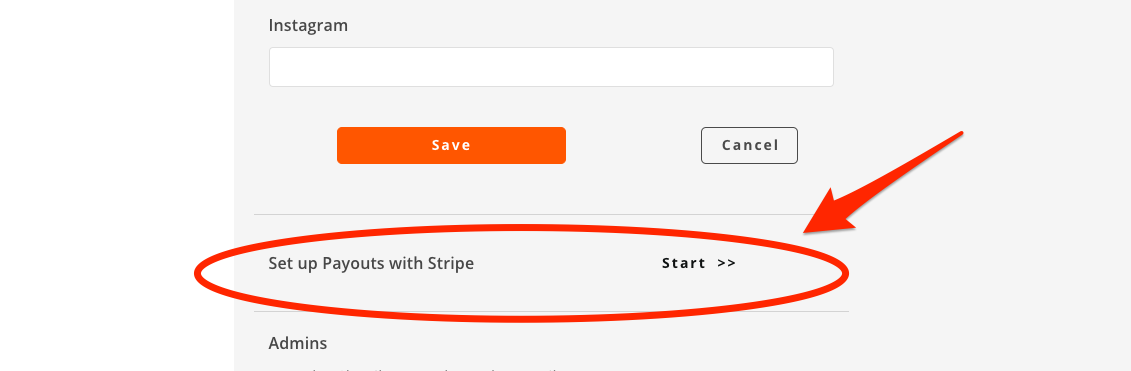
Click on "Start" and follow the instructions from there to set up your payout via Stripe. You will need to enter a debit card or bank account information, where your sales will be transferred to.
Step 1: Create a soundcast
All the audio content published on Soundwise are organized as “soundcasts”. Think of a soundcast as an audiobook, an album, an audio course or podcast series. When you first log in to your publisher dashboard, you will see the "Add New Soundcast" button. Click on that to create a new soundcast.

Step 2: Set up your soundcast landing page
Once you’re on the soundcast editing/creation page, you want to have the “this is a public soundcast” option switched on, so that your landing page is publicly accessible.
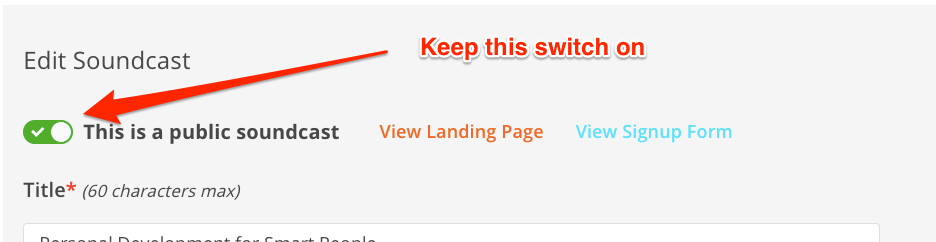
You should then fill in the information about your product to create your soundcast landing page.
We recommend you fill out all the blocks to present your soundcast in the best light possible. Make sure you think from your potential listeners' point of view, and highlight the benefits of your product.
Title: The title of your product
Short description: Briefly explain the audio product's value to your listeners.
What listeners will get: Explain the benefits of your soundcast, in bullet points. Why should people listen? What are the content highlights? Do your customers get additional materials besides the audios, e.g. worksheets, pdf slides, Q&A time with you? How would your program make the listeners’ life better?
Long description: Use this space to describe your soundcast in more details. For example, what's your back story for creating the soundcast? How is your product different? If you have listener testimonials, add them here, too.
Cover art: A square image is required. The cover art should be at least 1400px by 1400px and no bigger than 3000px by 3000px.
Host name (optional): The name of the person or organization creating the soundcast.
Host image (optional): A great picture of you.
Host bio (optional): Tell your listeners how awesome you are.
To see an example soundcast landing page, go here.
Step 3: Set your pricing
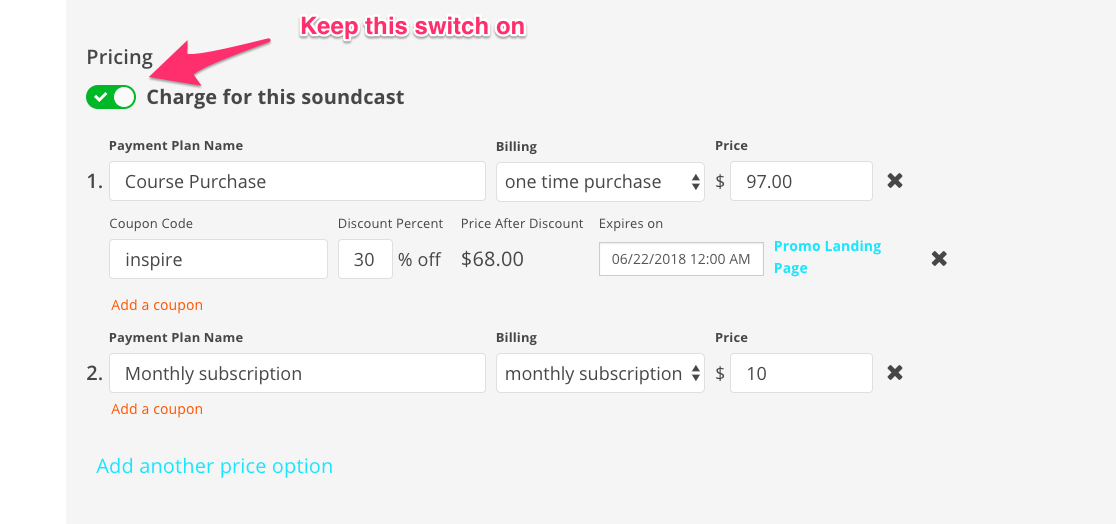
Scroll down your soundcast creation/edit page to the "pricing" block. Make sure you turn the "charge for the soundcast" switch on.
You can then set up your price(s). You can set up multiple charging options. You can also create promo codes and promo version of the landing page to incentivize sales.
Add a Subscriber Welcome Message
Scroll down the soundcast editing page, and you’ll find a block for “subscription confirmation message”. This is a welcome email that will go out to every customer on your behalf once they buy your soundcast. You can customize this message as you see fit.
Please don’t take out the information that’s already in the message template (it instructs the subscribers on how to listen to your podcast on Soundwise). But feel free to add anything else you want your listeners to know or do. For example, you can include the links to any additional materials that your customers will get besides the audios.
After you're done putting in the information, don’t forget to hit the publish button. Only the published soundcasts will be shown to listeners. You can always come back and change the information later.

Step 4: Add audio tracks (episodes) to your soundcast
Each of your soundcast should include at least one audio track (episode).
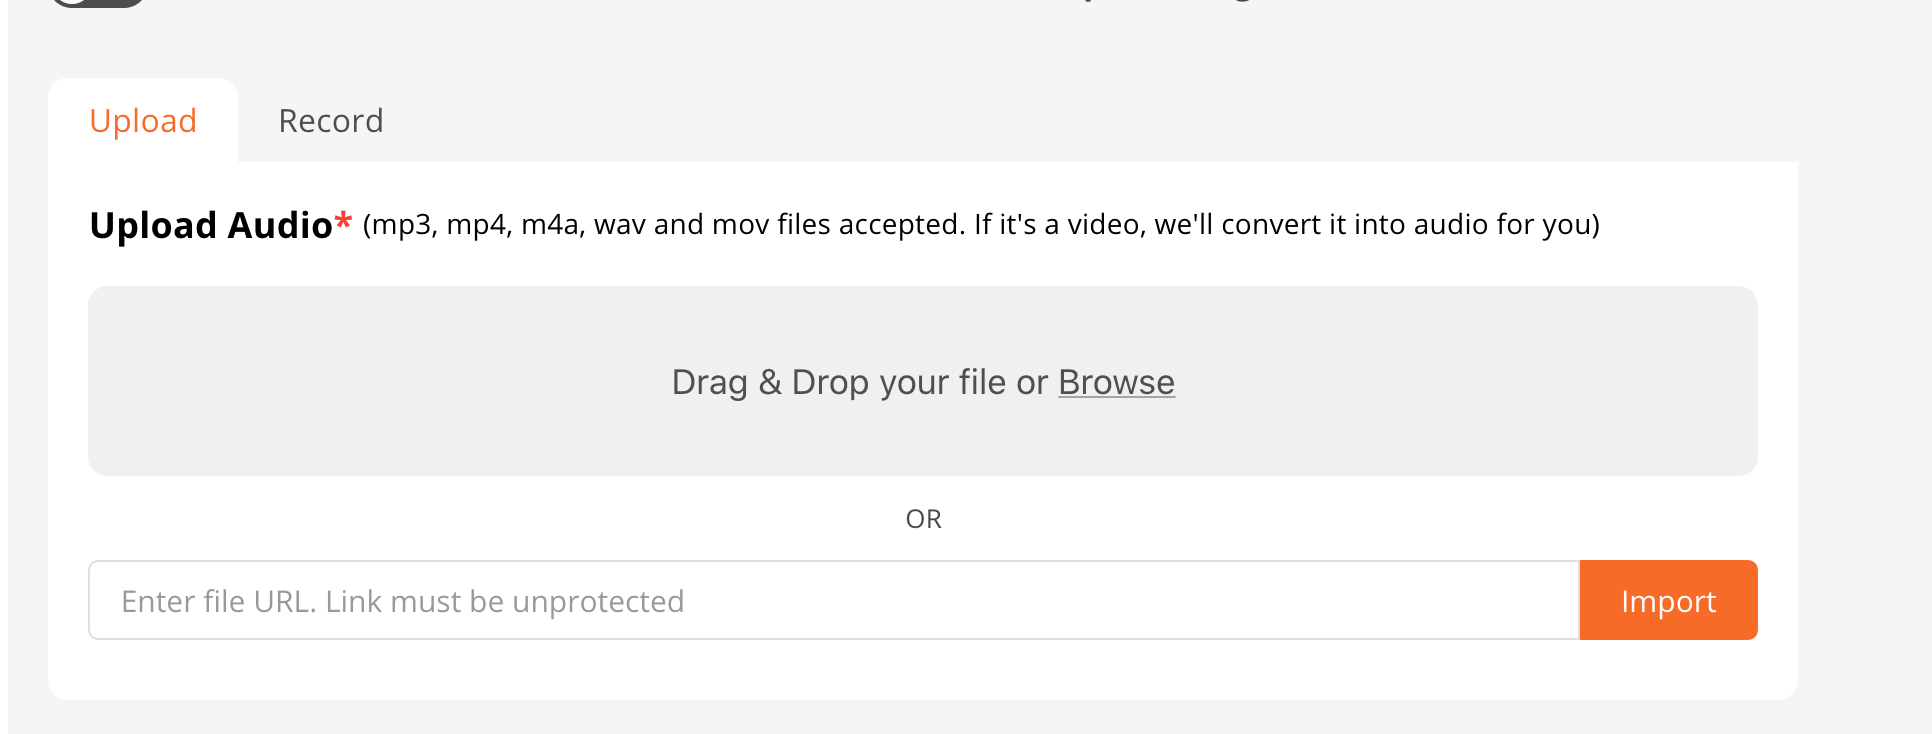
Click on the “Add track” button on the left menu bar to open a track creation page. From there, you can upload an audio file from your computer, or import it from a cloud drive like Dropbox.
You can also switch on the "bulk upload" toggle to upload multiple tracks at once.
After you upload an audio track to your soundcast, add additional information about this track:
Title*: This is the title of your audio track.
Description*: This is the place to include any descriptive information about this track.
Action steps: Do you have any call to action for your listeners after they listen to this track? Any “homework assignment”? If so, include it here. This entry is optional.
Notes: In the Notes section, you can upload supplementary material that provides additional value added to your listeners. e.g. presentation slides, worksheets, background readings. The upload must be a PDF or an image file. This item is optional.
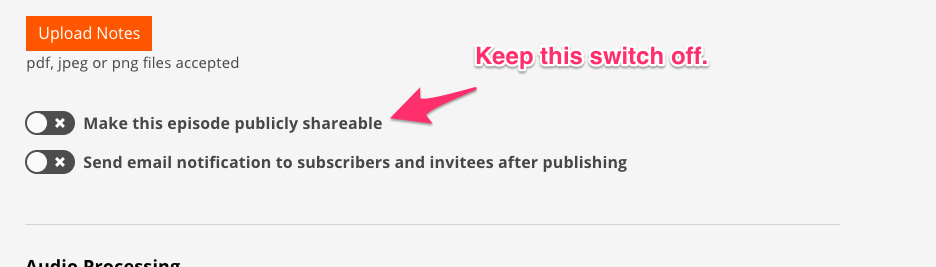
Keep the tracks non-public
Since you only want people to be able to listen to the tracks after they buy the soundcast, make sure you keep the "make this track publicly shareable" switch off.
On the other hand, if your soundcast consists of multiple tracks, it may be a good idea to allow potential customers to sample listen one or two of your tracks. In that case, you want to have this switch on, for the "sample" tracks. So that people will be able to play the tracks from your soundcast landing page, before they make a purchase.
Finally, after you're done with creating the track, don't forget to hit the "publish" button on the right side of your screen to save your track.
