How to connect Soundwise to Zapier for exporting and enrolling new listeners
 Updated
by Charis
Updated
by Charis
You can connect your Soundwise account to a third-party app via Zapier, in order to
1) automatically export any new listener (name and email) information from a souncast of yours to a third-party app (e.g. your email campaign management app or CRM app), and
2) sign up listeners using a third-party app (e.g. an e-commerce app such as Shopify or InfusionSoft), and automatically enroll them into one of your soundcasts.
The setup for both is fairly straightforward. It involves making a "zap" that connects to Soundwise. For general information on how to use Zapier, please refer to Zapier docs.
Part 0: Connect with the Soundwise App on Zapier
To connect with the Soundwise app on Zapier, please sign in to your Zapier account, and search for "Soundwise" in the app directory. You can also directly access the Soundwise app listing on Zapier.
Part 1: Export New Listeners from Soundwise to Other Apps
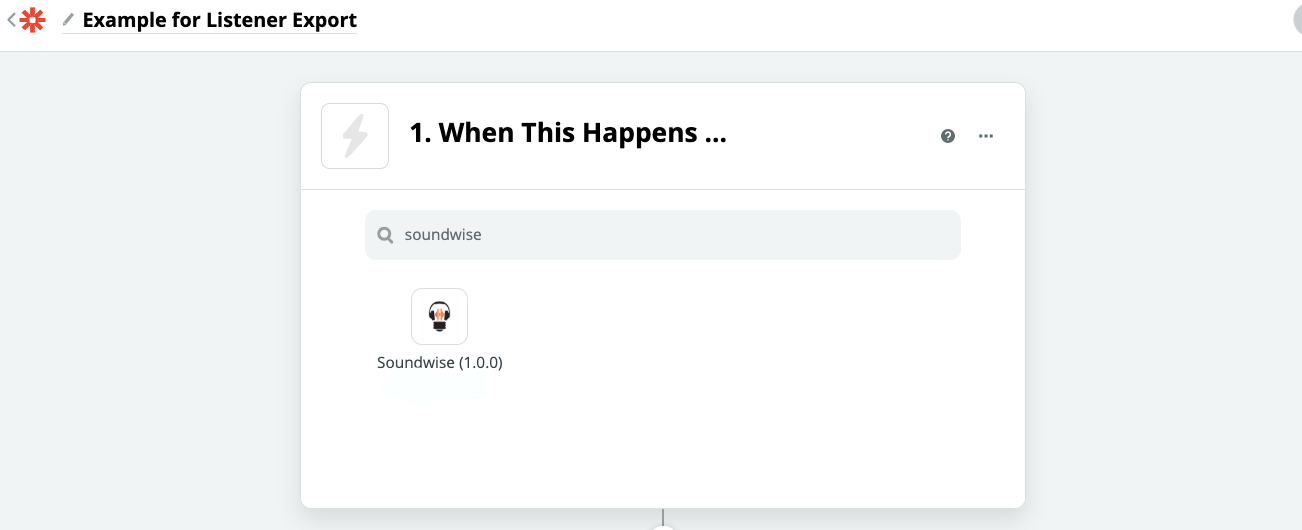
Step 1: Start a zap
On your Zapier dashboard, click on "Make a zap" on the top right corner. Search for "soundwise" in the input field for the starting app, and select the app.
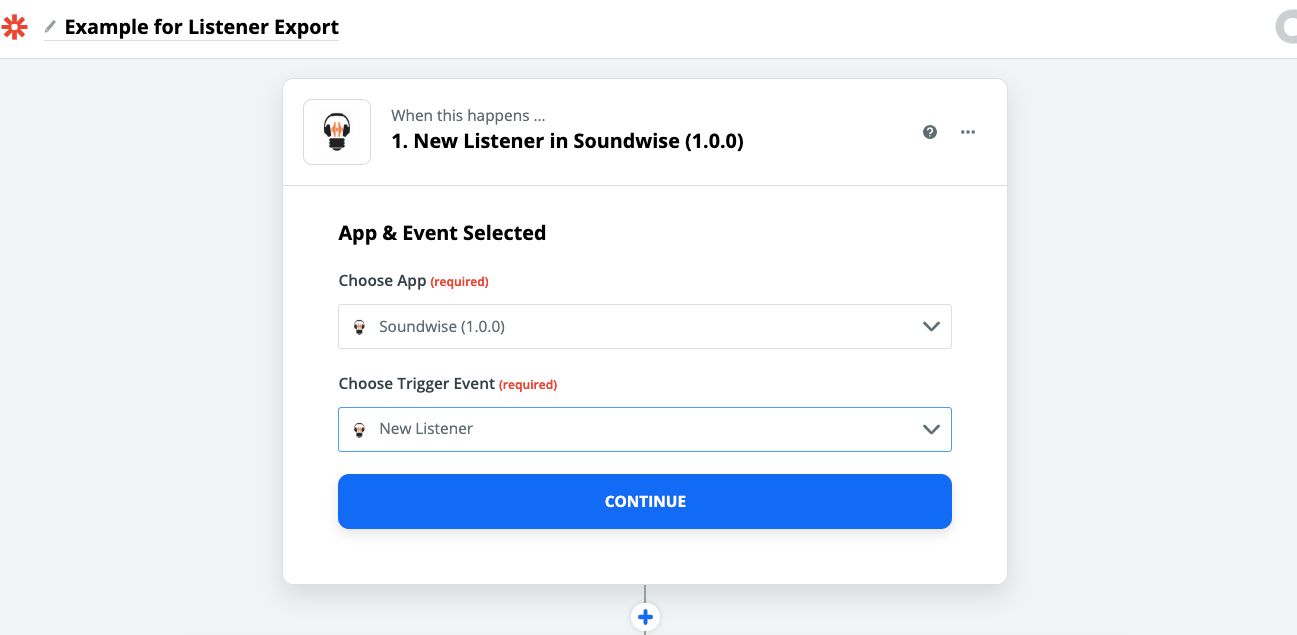
Step 2: Choose trigger event
You should choose "New Listener" as the trigger event.
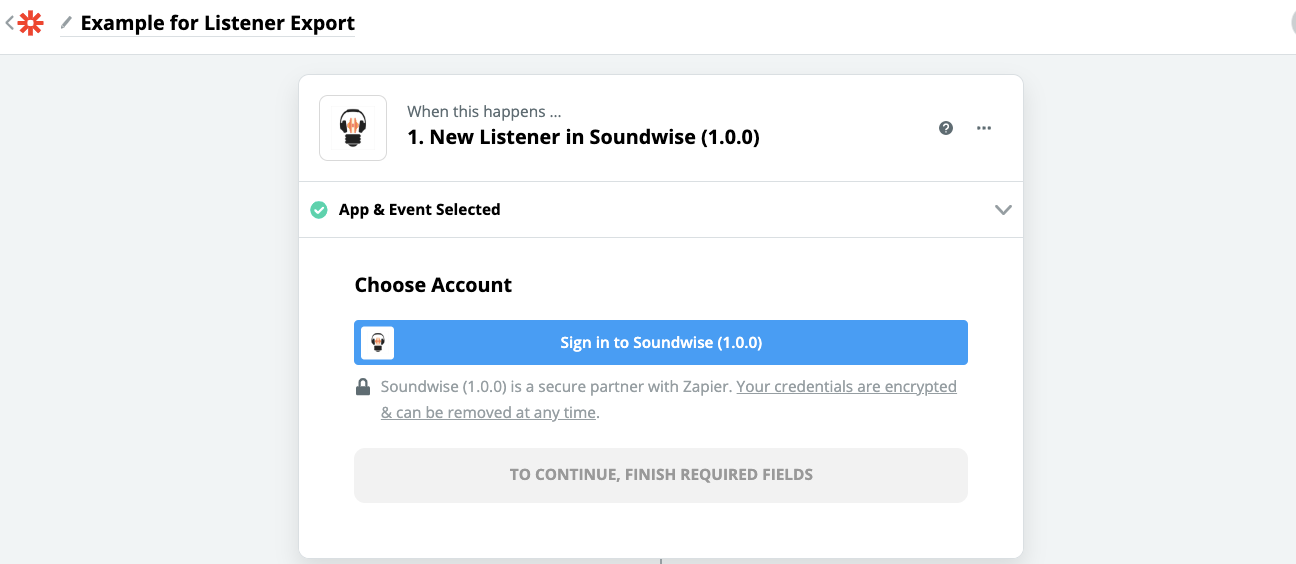
Step 3: Sign in to Soundwise and find your API key
If you have not connected Soundwise to Zapier before, you'll be asked to sign in to your Soundwise account, and enter your Soundwise API key.
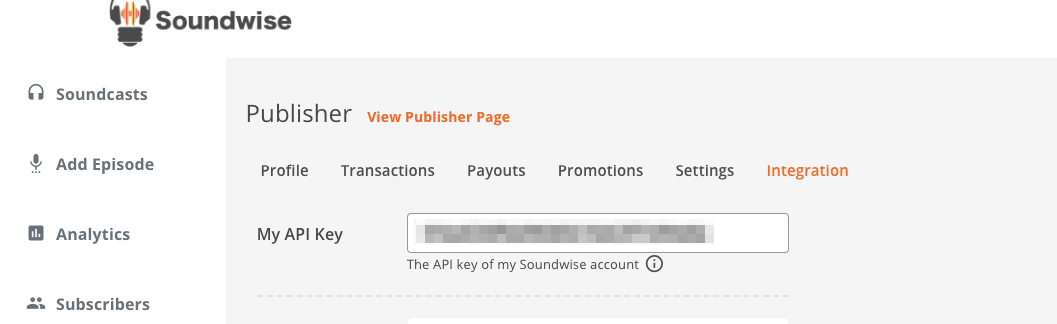
You can find your Soundwise API key on your Soundwise dashboard, under Publisher-->Integration. Keep in mind that you'll need a up-to-date PRO account or above in order for the API key to work.
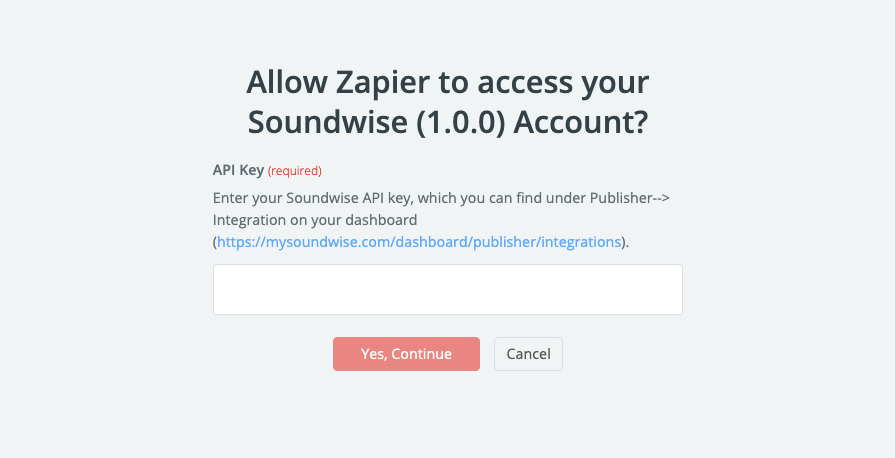
Copy your API key from your Soundwise dashboard and paste it into the Zapier input field where it's requested.
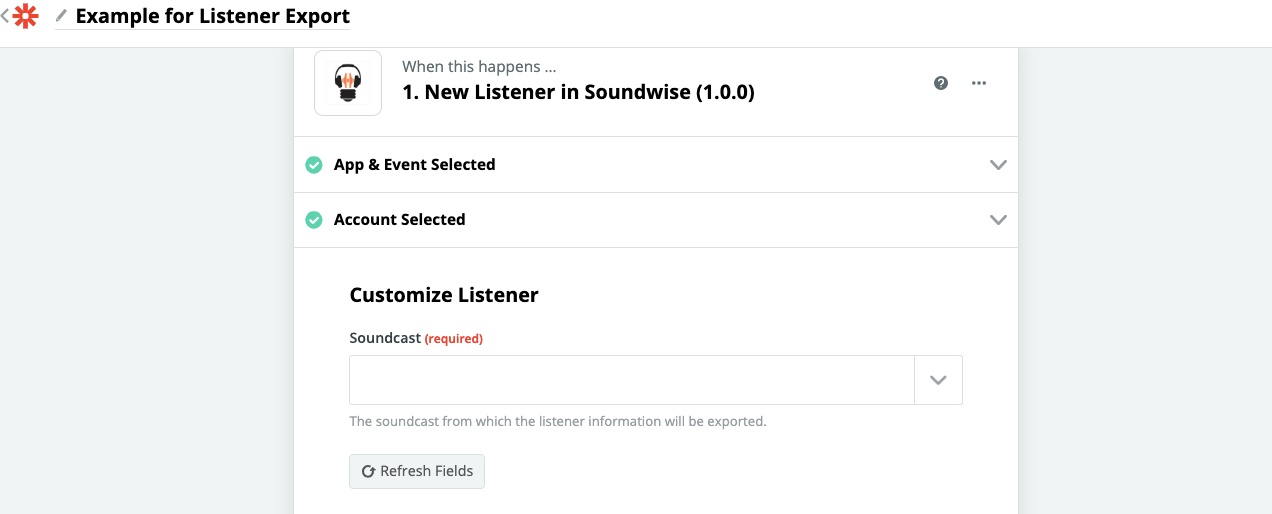
Step 4: Select the soundcast to export from
Zapier will then ask you to select the soundcast from which to export new listeners. Keep in mind that if you have multiple soundcasts, only the listeners from the soundcast you chose here will be automatically exported.
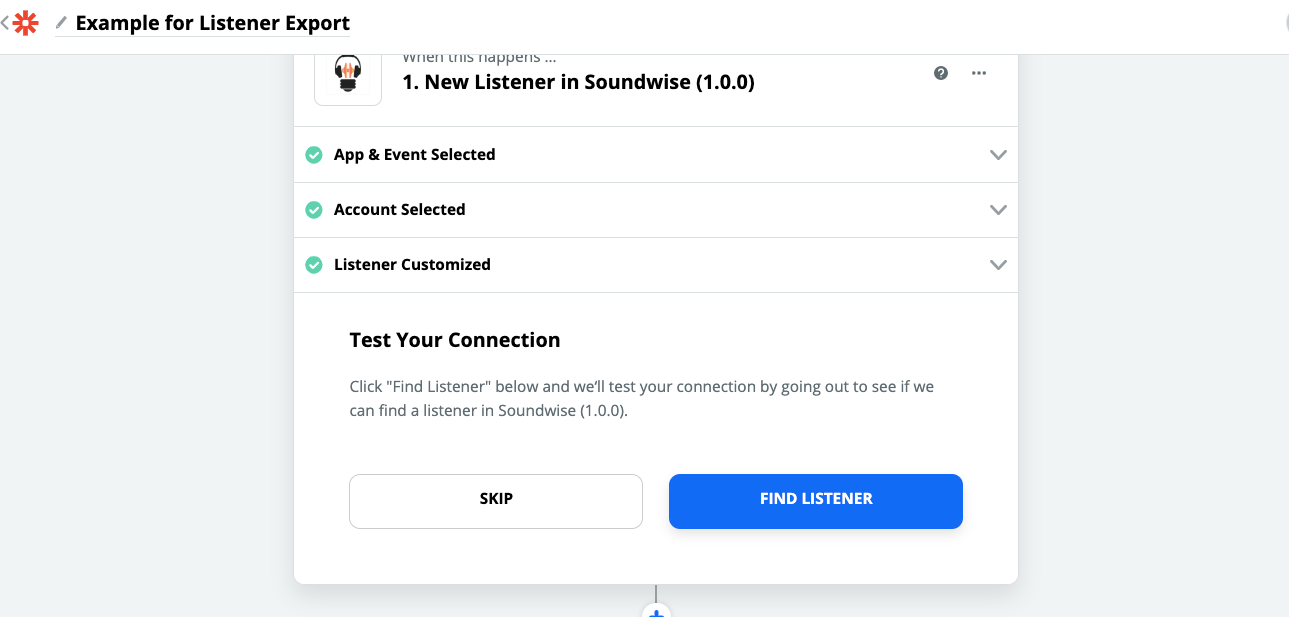
Step 5: (optional) You can test your connection to make sure it's working
Step 6: Choose the connecting app
Next, search and find the app you want to export your listeners to, or select one of the apps you've already connected in Zapier.
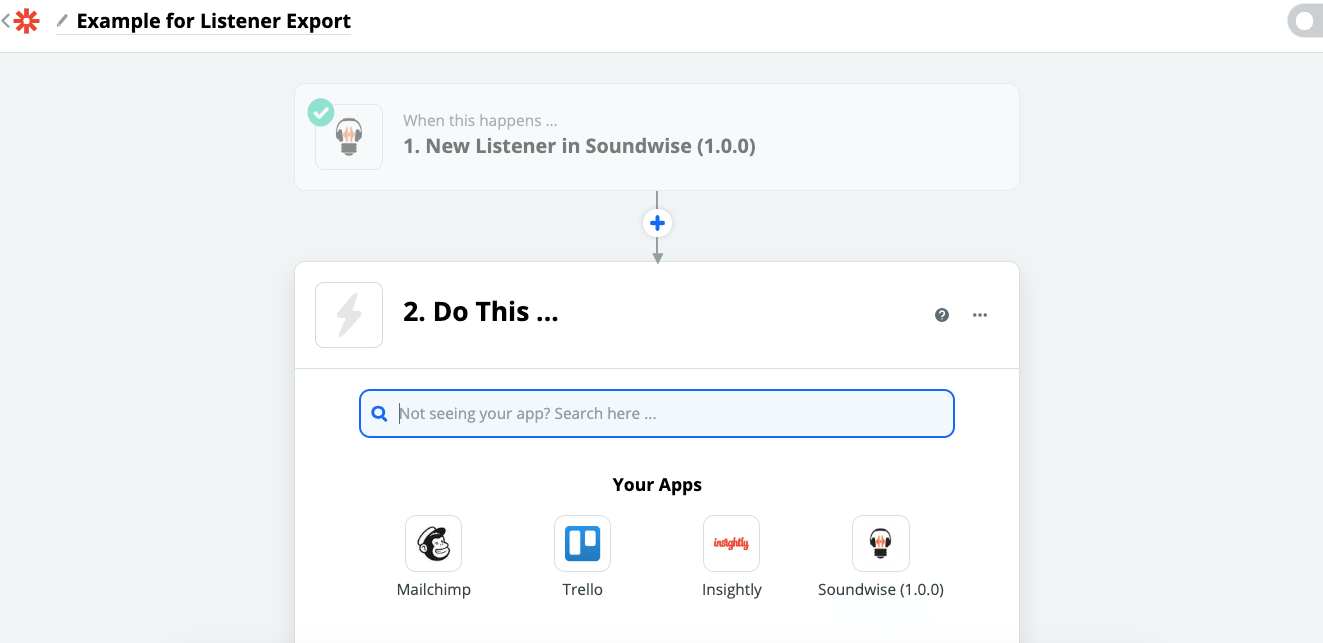
For illustration, we'll use MailChimp as the connecting app in this tutorial. You'll need to choose which action step you want to take in the connecting app, once a listener is exported. In this case, we choose the action of subscribing the listener to an email list in our Mailchimp account.
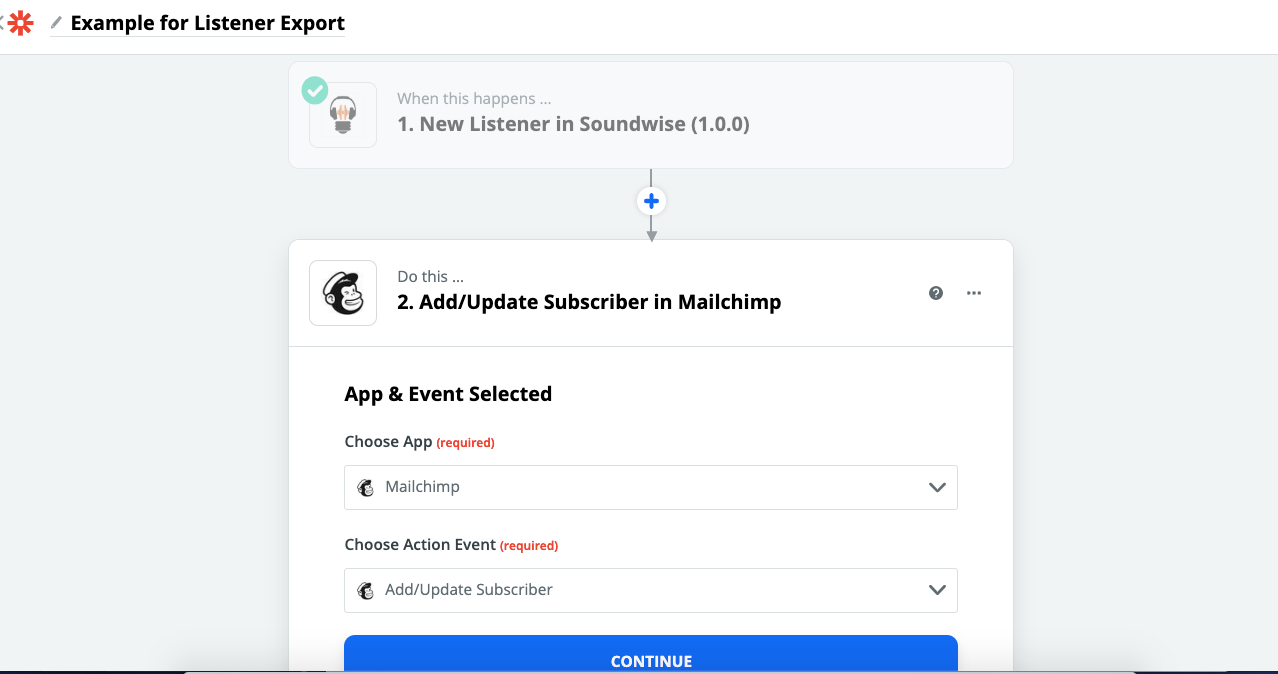
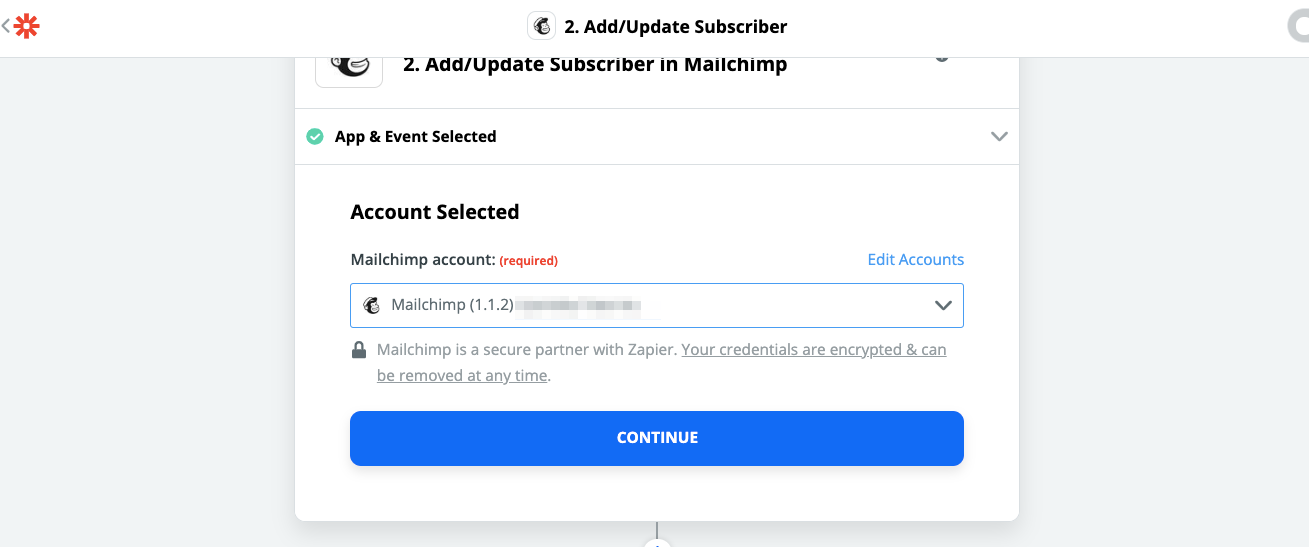
If you have multiple accounts on the connecting app, make sure to pick the account that you want to export listeners to.
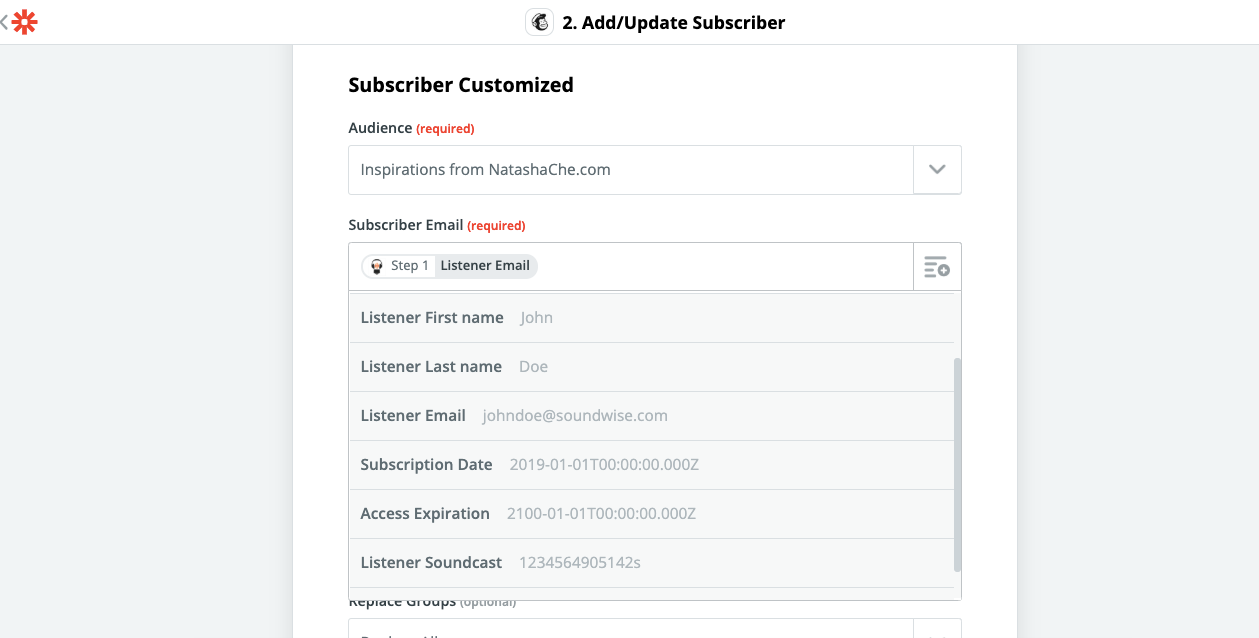
Step 7: Choose matching export fields
Next, you need to match the information exported from Soundwise (the available information includes: email, first name, last name, soundcast ID, signup date, access expiration date), with the information fields available in the connecting app.
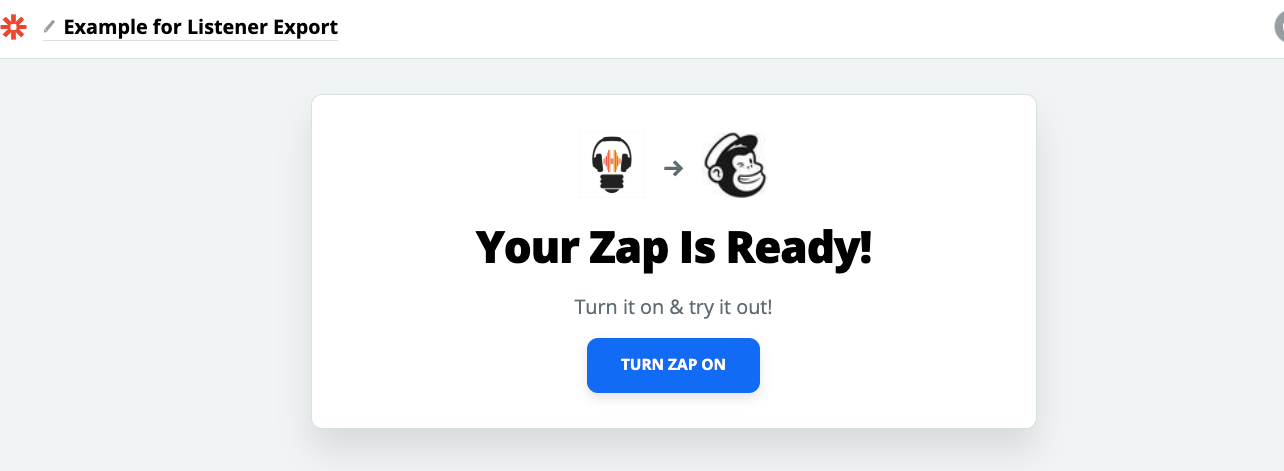
Step 8: Turn on the zap!
That's it. You're ready to start your zap and automatically export any new listeners from your soundcast to the connecting app!
What if you have multiple soundcasts?
The tutorial above focuses on exporting the listeners from one soundcast. But what if you have multiple soundcasts and multiple lists you want to export to? This is actually pretty easy. You can use a Zapier tool called the Lookup Table. This is a matching table that you can set up to match the soundcast ID in your catalog with the IDs of your lists in your CRM app, so that listeners in soundcast A can be exported to the list that matches soundcast A. To know more about how to set up the lookup table, please refer to the Zapier documentation here.
Part II: Enroll Listeners to Your Soundcast from Another App
In this section, we'll walk through how to sign up listeners from a third-party app (e.g. an e-commerce software you use to process the payments of your audios), and then automatically enroll the new listeners in the soundcast they purchased.
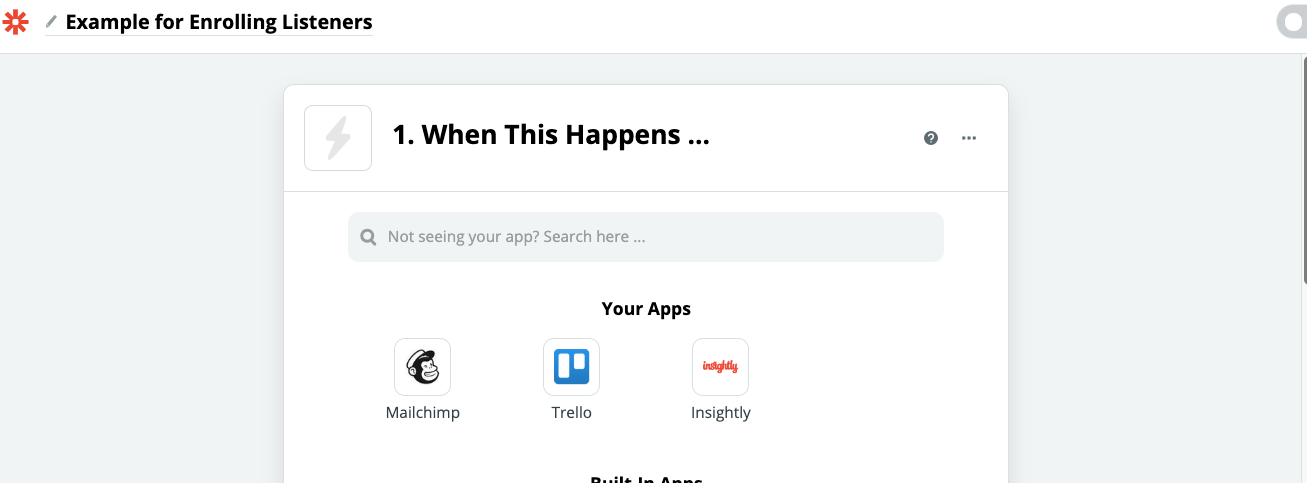
Step 1: Choose the trigger app.
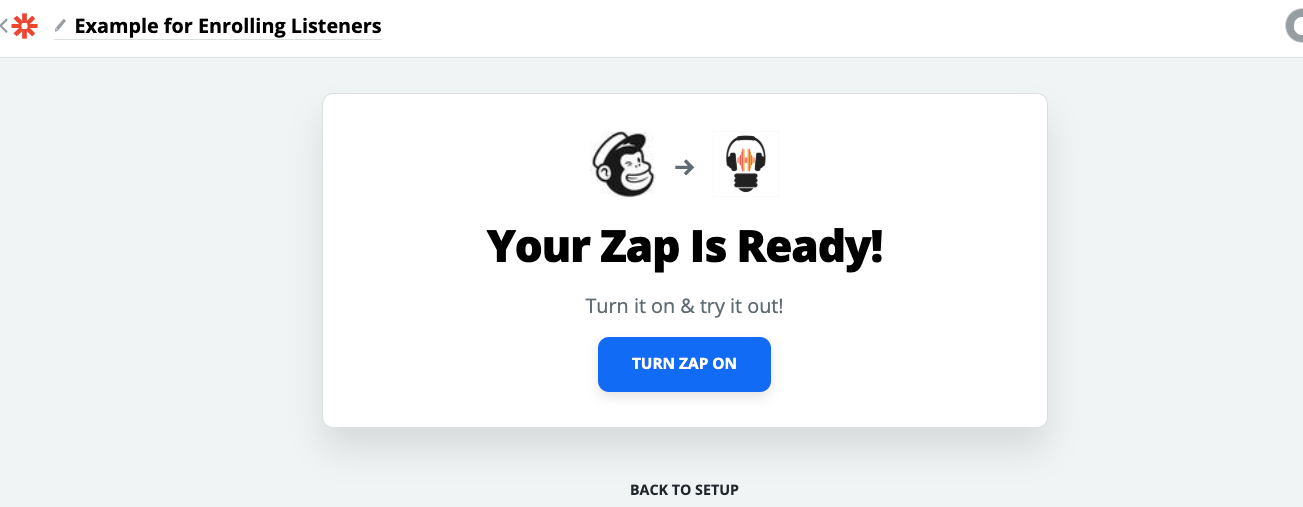
Click on "Make a zap" button on the top right corner of your Zapier dashboard to start a new zap. And then find/select the app that you use to sign up new listeners. In this tutorial, we'll choose Mailchimp as an example. So our goal is to enroll everyone who signs up to our email list managed by Mailchimp into a soundcast we've published on Soundwise.
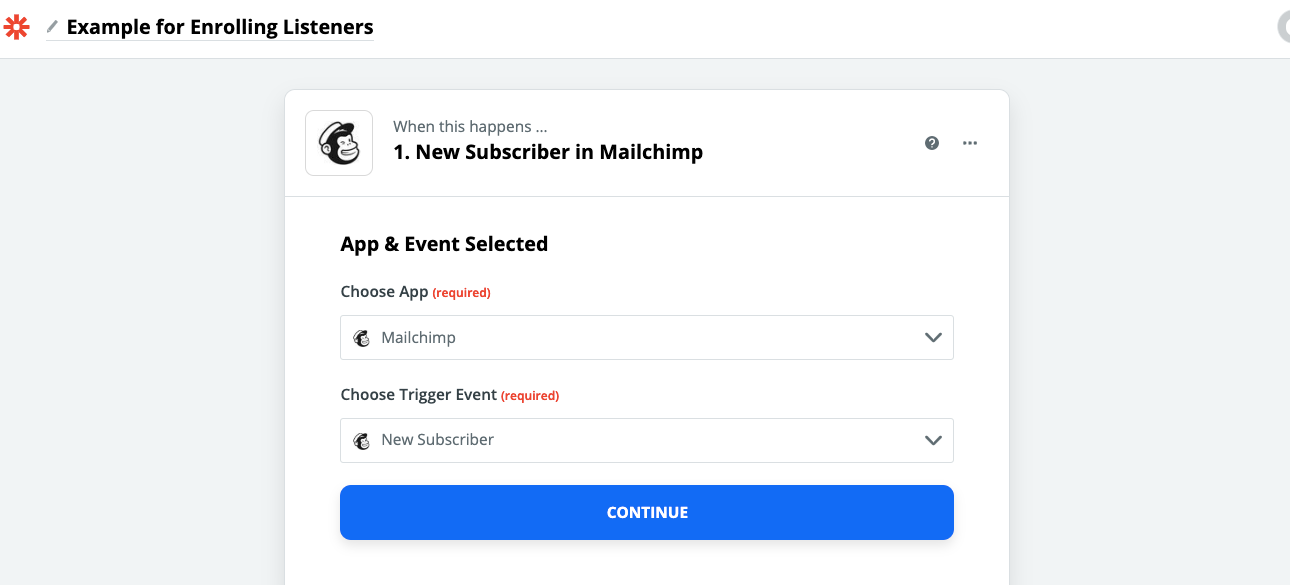
Step 2: Choose the trigger event.
After selecting the trigger app, you'll be asked to choose the trigger event. In our current example, the event would be a new listener signing up for our email list.
A note on soundcasts sold as subscriptions. If your soundcast is sold as a monthly or annual subscription, you'd need to update a listener's access permission every month or year, when the listener's payment is made for the next subscription period. Depending on the events allowed from your trigger app, you may need to set up a different zap for events such as "subscription renewal success", or "payment success", so that your listeners' access right to your soundcast will be updated continuously, beyond the initial signup.
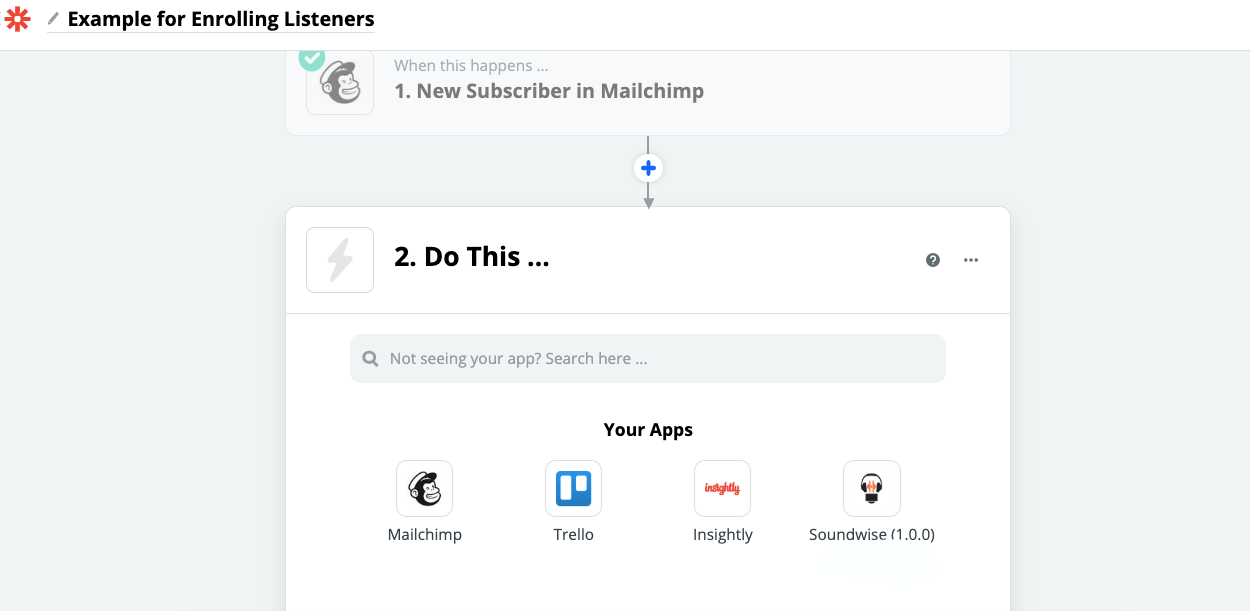
Step 3: Choose Soundwise as the connecting app
Search / select Soundwise as the connecting app. If you have not connected your Soundwise account to Zapier yet, you'd be asked to connect your account by entering your Soundwise API key. For how to do this, please refer to Step 3 in Part I of this tutorial.
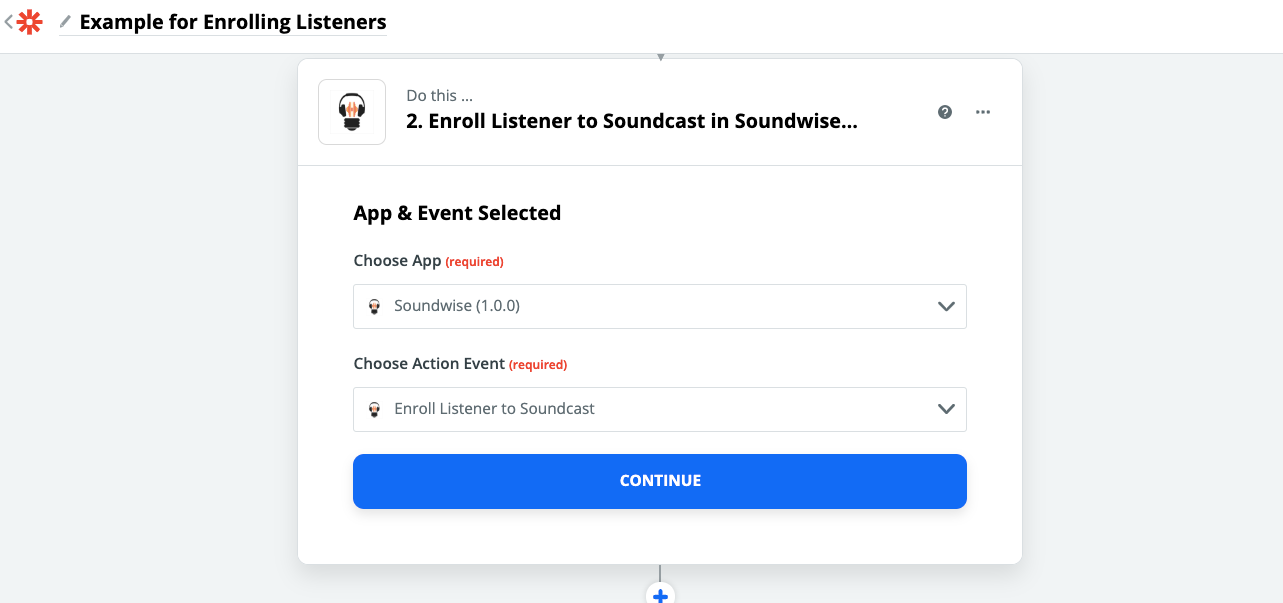
Step 4: Choose the action event
Next, please choose "enroll/update listener in soundcast" as the action event.
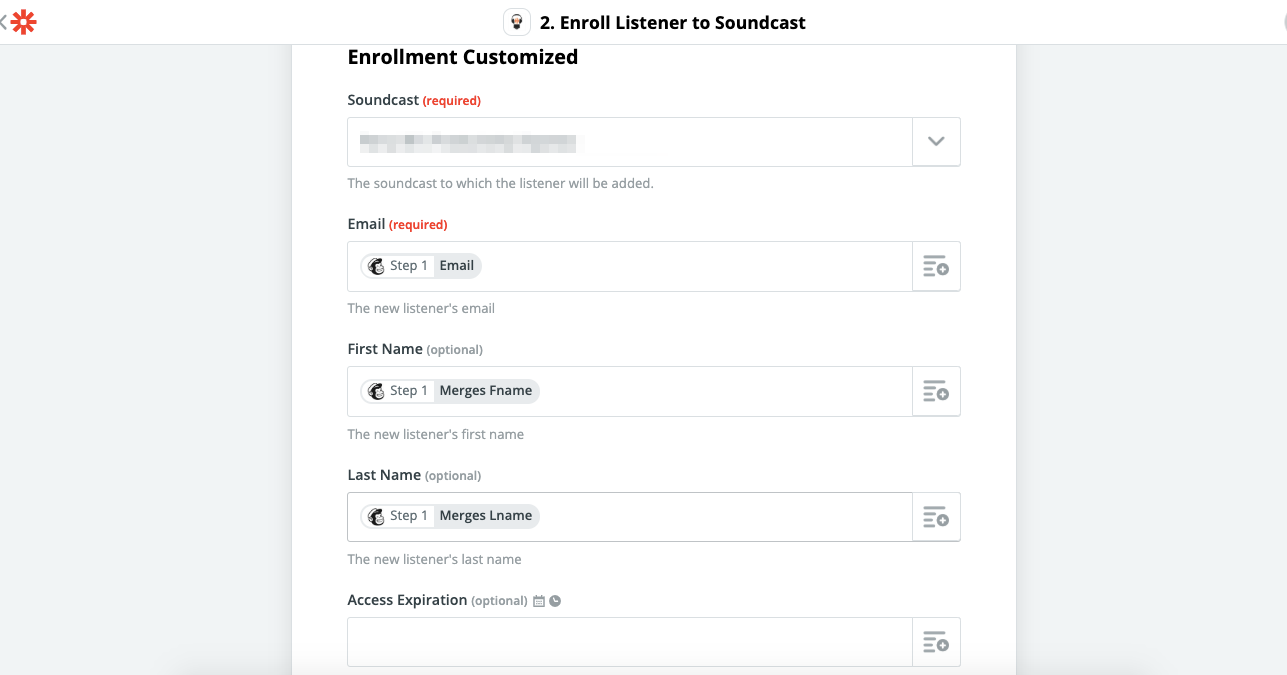
Step 5: Choose the soundcast to enroll listeners in and the matching fields
This is an important step. You'll need to choose among the soundcasts you've published to enroll the new listeners in, and the listener information to be sent to us. This may include: email address (mandatory), first and last names.
A note on "access expiration". This is a field that is only required if your soundcast is rental or subscription based. This information, exported from the trigger app, tells us for how long we should grant the listener access to your soundcast. If this is a rental-based soundcast, the "access expiration" field should be the date/time when the listener's rental access should expire. If your soundcast is subscription based, this field should tell us when the current subscription period ends for this listener.
As mentioned previously, for subscription-based soundcasts, you may need to set up an additional zap for the event of subscription renewal success, so that the listener's access in Soundwise will be updated periodically.
If you do not set up the "access expiration" field, the listener will be granted forever access to your soundcast. Therefore, if your soundcast is a one-time sale, you should ignore this field.
Step 6: Turn on your zap!
Congratulations! You've set up automatic enrollment for your soundcast. Easy, isn't it?
What if you are selling multiple audio products?
The tutorial above focuses on enrolling listeners to one soundcast. But what if you are selling multiple soundcasts from your website? No, you don't need to set up one zap for each soundcast. You can use a Zapier tool called the Lookup Table. This is a matching table that you can set up to match the soundcast ID in your catalog with the product IDs in your e-commerce software, so that customers who bought product A can be granted access to the soundcast that matches product A. To know more about how to set up the lookup table, please refer to the Zapier documentation here.